- เทียร์
- T3
- อันดับ
- #97
- อัตราชนะ
- 49.69%
- อัตราเลือก
- 1.26%
Miss Fortune ถูกจัดอยู่ในระดับ T3 ตามข้อมูล ARAM Mayhem ปัจจุบัน ดูไกด์แชมเปี้ยน
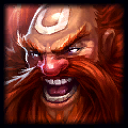
Gragas ถูกจัดอยู่ในระดับ T3 ตามข้อมูล ARAM Mayhem ปัจจุบัน
Gragas the Rabble Rouser
Gragas can fill all three, but you should decide early based on your team. If your backline already has damage, build durable and use Body Slam plus Explosive Cask to start fights or peel dives. If your team lacks burst, play around barrel poke and cask picks, but accept that a missed combo leaves you much easier to punish.
Fight when the enemy has stepped past the minion wave or used a key dash, because your engage is much cleaner when they cannot hide behind bodies or instantly leave. Use Snowball or Body Slam only if your team is close enough to follow. If you go in alone, Gragas looks tanky for a moment and then disappears.
Aim the cask to knock enemies back toward your team, into your barrel zone, or away from your carry. If the target is already locked down by allies, do not panic-ult them out of your team’s damage. The tradeoff is patience: holding cask can feel wasteful, but a bad cask often ruins a won fight.
Poke with Barrel Roll when the enemy is forced to stand near minions, a turret area, or a narrow path. Hold it when your team is about to engage, because a placed barrel makes your Body Slam or cask follow-up much more threatening. The cost of constant poke is mana and pressure timing; if you spend everything early, you may have no setup when the real fight starts.
Snowball is very strong when you need a reliable way to enter fights without burning Body Slam first. Land Snowball, wait for the enemy reaction, then choose whether to dash in, cask, or cancel the play. The downside is obvious: if you take every mark just because it landed, you will deliver yourself into five players.
The safest engage is not always Body Slam first. Look for a slow target, mark them with Snowball if possible, then use Body Slam after they spend their movement tool. This keeps an escape or second crowd-control angle available, but it means you need patience instead of forcing the first opening you see.
Stand slightly beside or behind your damage dealers and punish the first diver who commits. Body Slam can interrupt or stall a dive, and Explosive Cask can split the diver from their follow-up. The tradeoff is that you may give up flashy engages, but saving your carry often wins more fights than chasing a low-health target.
Use bushes, minion waves, and Snowball threats to shorten the lane instead of walking straight through poke. If they spend major damage on the wave or miss a long-range ability, step up and threaten a cask or Body Slam angle. You will take some chip damage either way, so the goal is to trade health for a real engage window, not for random barrel attempts.
Do not rush past your own carries unless the enemy backline is completely exposed. Let their divers enter first, then Body Slam or cask them away from your squishies. This can feel passive, but dive comps lose a lot of power when their first champion goes in and the rest cannot follow cleanly.
Build and position like the first body in the fight, because your team needs someone to absorb vision pressure and start the trade. Use Drunken Rage before contact when you expect to take return damage, then create space with Body Slam and cask. The tradeoff is lower burst; you are buying time and angles for allies, not one-shotting every target yourself.
Let the main tank show first, then play as the second engage or counter-engage. This gives you better cask angles because enemies often clump or dash after the first initiation. If you both dive at the same time with no spacing, the enemy can kite backward and leave your backline uncovered.
Mobile carries and champions with reliable disengage are annoying because they can dodge your Body Slam line or punish your missed engage. Against them, wait for their movement spell, use terrain and bushes, and aim to cask them into your team rather than chasing forever. If you force too hard, they kite you while your team fights without its engager.
Pick augments that match your job in the lobby: durability and engage tools when you are frontlining, burst or ability-enhancing options when your team needs damage, and utility when your carries are the win condition. Do not take a greed damage augment if you are the only champion who can start fights. The best augment is the one that lets you survive long enough to use your second spell rotation.
If you miss Body Slam or cask, stop chasing and reset behind your wave or your carry line. Use Barrel Roll to slow the enemy’s advance and save your next movement tool for peel. The mistake gets much worse if you keep walking forward with no cooldowns, because Gragas is threatening when his spells are ready, not when he is waddling into five people.
The biggest mistake is treating every angle as an all-in. Gragas is strongest when he makes enemies respect multiple threats: poke, peel, displacement, and sudden engage. If you only dive forward, opponents hold their disengage for you; if you vary your timing, they start mispositioning before the fight even begins.
แชมเปี้ยน / เทียร์
Miss Fortune ถูกจัดอยู่ในระดับ T3 ตามข้อมูล ARAM Mayhem ปัจจุบัน ดูไกด์แชมเปี้ยน
Vi ถูกจัดอยู่ในระดับ T3 ตามข้อมูล ARAM Mayhem ปัจจุบัน ดูไกด์แชมเปี้ยน
Tahm Kench ถูกจัดอยู่ในระดับ T3 ตามข้อมูล ARAM Mayhem ปัจจุบัน ดูไกด์แชมเปี้ยน
Viego ถูกจัดอยู่ในระดับ T3 ตามข้อมูล ARAM Mayhem ปัจจุบัน ดูไกด์แชมเปี้ยน
Rammus ถูกจัดอยู่ในระดับ T3 ตามข้อมูล ARAM Mayhem ปัจจุบัน ดูไกด์แชมเปี้ยน
Riven ถูกจัดอยู่ในระดับ T3 ตามข้อมูล ARAM Mayhem ปัจจุบัน ดูไกด์แชมเปี้ยน
Corki ถูกจัดอยู่ในระดับ T3 ตามข้อมูล ARAM Mayhem ปัจจุบัน ดูไกด์แชมเปี้ยน
Yuumi ถูกจัดอยู่ในระดับ T3 ตามข้อมูล ARAM Mayhem ปัจจุบัน ดูไกด์แชมเปี้ยน
Draven ถูกจัดอยู่ในระดับ T4 ตามข้อมูล ARAM Mayhem ปัจจุบัน ดูไกด์แชมเปี้ยน
Nocturne ถูกจัดอยู่ในระดับ T3 ตามข้อมูล ARAM Mayhem ปัจจุบัน ดูไกด์แชมเปี้ยน