- Tier
- T5
- Posizione
- #164
- Tasso vittoria
- 44.93%
- Tasso scelta
- 0.32%
Gnar è attualmente classificato T5 nei dati ARAM Mayhem. Vedi guida campione
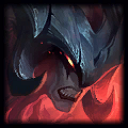
Aatrox è attualmente classificato T5 nei dati ARAM Mayhem.
Aatrox the Darkin Blade
He is a solid bruiser who excels in extended fights where he can stack his healing and reset his cooldowns. He struggles against heavy poke or disengage before he closes the gap, but he becomes a raid boss once he gets his ultimate and a few items. Pick him if your team has engage support, but avoid first-picking him into kite-heavy compositions.
Your goal is to survive the initial burst, pop your ultimate, and sustain through the fight with constant ability resets. You want to hit multiple enemies with your sweetspot abilities to maximize healing and damage. If you dive too deep without your ultimate ready, you will get burst down before your healing kicks in.
Always aim for the sweetspot at the edge of the impact zone to deal bonus damage and apply grievous wounds. Use the first cast to zone, the second to catch sidestep patterns, and the third to knock up enemies trying to flee. Hitting the center deals reduced damage and healing, so spacing matters more than spamming.
Use W to pull enemies back who are trying to escape your Q combos or to set up a guaranteed knockup. It works best when you chain it after a teammate's crowd control or when an enemy is trapped against a wall. Do not waste it as a poke tool because the cooldown is long and the range is short.
His E is a short dash that resets on takedowns and grants healing based on your damage output. Use it to reposition for Q sweetspots, dodge key skillshots, or chase low-health targets. Save the second cast for after a kill to keep chasing rather than blowing both charges at once.
Activate it when you are about to engage a full fight or when you drop below half health and need the burst of healing. The increased damage and healing on takedowns make you nearly unkillable if you can secure a reset. Popping it too early wastes the duration, but popping it too late means you die before the healing ramps up.
Start with a damage and sustain item like Goredrinker or a similar Mayhem-equivalent bruiser item to survive early poke. Follow up with Black Cleaver or Serylda's Grudge to shred armor and stick to targets. If the enemy has heavy healing, rush an early Chempunk Chainsword or similar anti-heal item.
Go for a bruiser build with damage first, then tank items as your third or fourth slot. You need damage to heal, so full tank leaves you useless, but full damage gets you exploded before you can sustain. Balance attack damage, ability haste, and health to stay in the fight long enough to stack your healing.
Play the first few waves passively and use your E to dodge key abilities rather than engaging. Wait for your Snowball to come off cooldown, then look for an engage when the enemy wastes their escape tools. If you force a bad fight early, you will get poked down and become useless for the rest of the game.
High mobility champions like Ezreal or Zed can dodge your Q consistently and kite you to death. Hard crowd control like stuns or knockups prevents you from healing and resets, so champions like Leona or Lissandra are dangerous. Anti-heal items also shut down your sustain, so play more carefully when enemies build Executioner's Calling or similar.
Look for augments that increase healing, ability haste, or survivability in extended fights. Augments that add crowd control or reset mechanics on takedowns synergize well with his kit. Avoid pure poke or mana-based augments since your strength comes from all-ins, not spamming from a distance.
Use Snowball to close the gap against poke champions, then follow up with your full Q combo and W to keep them locked down. Do not Snowball into five people alone unless your team is ready to follow up. Save it for key targets like enemy carries or to dodge a critical crowd control ability.
Diving too early without your ultimate or team support is the fastest way to throw. Players often overestimate their healing and engage into heavy burst or anti-heal before their sustain can ramp up. Wait for the enemy to commit cooldowns, then go in when you can actually survive the initial burst.
Look for flanks or wait for your tank to engage before you commit your full combo. Focus the enemy backline if possible, but do not tunnel vision so hard that you ignore threats peeling for them. Your job is to disrupt their formation, soak damage with your ultimate, and clean up with resets after each takedown.
Campioni / Tier
Gnar è attualmente classificato T5 nei dati ARAM Mayhem. Vedi guida campione
Camille è attualmente classificato T5 nei dati ARAM Mayhem. Vedi guida campione
Lee Sin è attualmente classificato T5 nei dati ARAM Mayhem. Vedi guida campione
Katarina è attualmente classificato T5 nei dati ARAM Mayhem. Vedi guida campione
K'Sante è attualmente classificato T5 nei dati ARAM Mayhem. Vedi guida campione
Zeri è attualmente classificato T5 nei dati ARAM Mayhem. Vedi guida campione
Irelia è attualmente classificato T5 nei dati ARAM Mayhem. Vedi guida campione
LeBlanc è attualmente classificato T5 nei dati ARAM Mayhem. Vedi guida campione
Bard è attualmente classificato T5 nei dati ARAM Mayhem. Vedi guida campione