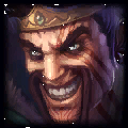
- Tier
- T3
- Ranga
- #106
- Win rate
- 49.66%
- Pick rate
- 0.27%
Nocturne jest obecnie sklasyfikowany jako T3 w danych ARAM Mayhem. Zobacz poradnik bohatera
Draven jest obecnie sklasyfikowany jako T4 w danych ARAM Mayhem.
Draven the Glorious Executioner
Yes, if you can keep attacking and catch axes under pressure. Pick him when your team has at least one champion who can start fights or peel, then play around short burst windows instead of walking forward alone. The tradeoff is brutal: if you drop axes or get zoned off the wave, your damage falls off fast and safer marksmen become easier to execute.
Draven wants to hit the closest safe target with Spinning Axe active, then cash in when someone gets low. If enemies burn crowd control or dash forward, step into a clean angle, attack once or twice, and back out before they can turn. The tradeoff is that chasing too hard for one kill often puts your axe marker in a dangerous spot.
Keep one axe going before fights and add pressure when your team is ready to contest space. If the catch spot lands forward into enemy threat, let it drop and reset rather than eating a full engage for one more empowered attack. The damage loss hurts, but dying with axes spinning is worse than rebuilding from safety.
Catch it when the marker is behind your frontline, inside your minion wave, or after enemy crowd control has already been used. Ignore it when it pulls you into hooks, knockups, traps, or burst range, then reposition and start again with your next safe attack. Good Draven play is not catching every axe; it is catching the axes that let you keep hitting.
Be aggressive when enemies cannot immediately punish your first attack, especially after your team lands poke or crowd control. Walk up, hit with an axe, use movement speed to reset spacing, and make them choose between losing health or wasting cooldowns. If you force too much before your team is in range, Mayhem fights can flip instantly and you become the easy target.
Use Blood Rush to reposition between attacks, dodge a key skillshot, or chase only after the enemy frontline has lost control of the fight. If you catch an axe and refresh your rhythm, keep moving sideways rather than straight forward so your next catch spot stays safer. The tradeoff is resource and tempo: spamming it with no plan can leave you overextended with no clean escape path.
Use Stand Aside to interrupt a champion walking at you, peel a diver off your body, or set up one more axe hit on a target trying to escape. Hold it when a bruiser or assassin is still looking for their entry, because using it for poke can open the punish window. It is not just damage; it is your best way to buy the half-second you need to keep attacking.
Use the ultimate to finish low-health enemies, punish a retreat through a narrow lane, or add damage after your team locks someone in place. If the target can sidestep or become untargetable, wait for their movement tool first and fire when their path is forced. The tradeoff is that a flashy long-range cast can miss completely, while a simple close follow-up often wins the fight.
Usually take Snowball only if your team has strong follow-up and you are comfortable using it as a threat, not a random dive button. Hit Snowball to mark a vulnerable target, then decide whether the second cast is safe after enemy crowd control and burst are visible. The tradeoff is that taking the dash can put you past your frontline, so sometimes the correct play is to keep the mark and never go in.
Look for augments that help repeated basic attacks, burst windows, movement, survivability, or safe cleanup. If an augment rewards standing still but the enemy team has heavy dive, value mobility or defensive options more because Draven needs space to convert damage. The tradeoff is simple: greedier damage choices can carry fights, but only if you already have enough protection to keep swinging.
Stand behind minions when possible, keep one axe ready, and punish the moment a poke champion misses their main spell. If you are low before the fight starts, stop contesting every axe and wait for health, shields, or an engage from your team. The tradeoff is patience: you may give up some early pressure, but you avoid being softened up before you can actually cash in.
Stay slightly behind your frontline and hold Stand Aside until the enemy commits. When the engage lands on someone else, step sideways, hit the closest target, and keep your axe markers away from the enemy backline. The tradeoff is target selection: killing the tank first may feel slow, but walking past them usually gives assassins the angle they wanted.
Your team should create stable space with peel, crowd control, and threat in front of Draven. If allies engage too far ahead, follow only when your axes can land safely and the enemy backline cannot instantly collapse on you. The tradeoff is that Draven looks strongest with coordinated pressure, but he looks terrible when forced to choose between catching axes and surviving alone.
The biggest mistake is treating every axe marker like a command. If the marker lands in danger, drop it, reposition, and keep your life instead of giving the enemy a free engage. Another common mistake is ulting too early; wait until movement is restricted or health bars are low enough that the cast actually changes the fight.
Play closer to your team, farm safe waves, and use axes only when the catch spot does not expose you. Look for cleanup kills after enemies spend mobility or crowd control, because Draven can still punish low-health targets if he gets one clean window. The tradeoff is that you must give up ego plays for a while, but one well-timed fight can put you back into the game.
Bohaterowie / Tier
Nocturne jest obecnie sklasyfikowany jako T3 w danych ARAM Mayhem. Zobacz poradnik bohatera
Volibear jest obecnie sklasyfikowany jako T3 w danych ARAM Mayhem. Zobacz poradnik bohatera
Cho'Gath jest obecnie sklasyfikowany jako T4 w danych ARAM Mayhem. Zobacz poradnik bohatera
Lissandra jest obecnie sklasyfikowany jako T4 w danych ARAM Mayhem. Zobacz poradnik bohatera
Rek'Sai jest obecnie sklasyfikowany jako T4 w danych ARAM Mayhem. Zobacz poradnik bohatera
Taliyah jest obecnie sklasyfikowany jako T4 w danych ARAM Mayhem. Zobacz poradnik bohatera
Rakan jest obecnie sklasyfikowany jako T3 w danych ARAM Mayhem. Zobacz poradnik bohatera
Mel jest obecnie sklasyfikowany jako T4 w danych ARAM Mayhem. Zobacz poradnik bohatera
Nasus jest obecnie sklasyfikowany jako T4 w danych ARAM Mayhem. Zobacz poradnik bohatera
Quinn jest obecnie sklasyfikowany jako T4 w danych ARAM Mayhem. Zobacz poradnik bohatera